Flights, Visas, and Travel Insurance
Planning a trip is a great amount of work, especially for a planner like myself. No, I’m not just going to show up and “wing it.” No, I’m not just going to look at someone else’s itinerary and do every single thing that they do. I’m going to research. I’m going to look at TripAdvisor, Google, Pinterest, Facebook, read blogs, read multiple itineraries, and I’m going to choose the best locations for me. Over ten people have already asked me, “Oh, are you going to Koh Phi Phi in Thailand?” No, I’m not. I don’t want to go somewhere just because everyone else is going/has went. I want to find some less travelled places that are even more stunning! I had my Southeast Asia trip planned within my first two months of living in Australia. Back when I was doing my farmwork and living on a farm with nothing to do, I got the sudden urge to plan a trip. And since I had unlimited hours of free time, I spent it all researching about places to go to. I already had a rough itinerary planned before I moved out of my first house. It was when I moved into my second house (in April) that I booked my flights. The most expensive flight (in comparison to the others) was to go to Taiwan, but because I had made so many new Taiwanese friends at the tomato farm, I knew it would be worth going. In my opinion, I did a pretty good job when it came to my flight prices:
Roundtrip Melbourne to Bangkok - $763
Roundtrip Bangkok to Krabi (Thailand) - $103
Roundtrip Bangkok to Kuala Lumpur (Malaysia) - $124
Roundtrip Kuala Lumpur to Taipei (Taiwan) - $310
=$1300
Quite a few months later, I really started thinking that I should visit my sister, brother-in-law, and two nephews in Shanghai. I had pondered it before, but the price of the flights made me decide not to buy a ticket. However, I realized that I hadn’t seen my brother-in-law since he visited me in London over a year and a half ago, I hadn’t seen my sister and nephew since my 25th birthday, which was almost four years ago, and I haven’t even MET my other nephew, who turns two years old in January. I figured I should leave Melbourne a week earlier so that I could spend a week with the family in Shanghai before Christmas. So adding that (more expensive) flight into the equation:
Roundtrip Bangkok to Shanghai - $463.74 (with baggage)
=$1763.74 total,
which honestly isn’t that bad for a 4.5-month trip. On top of my flights, I also had to apply for a couple of visas ahead of time:
Visa for China - $148
Visa for Vietnam - $100 (plus postage and postal insurance).
I’ll also have to pay for my visas in Laos and Cambodia, but won’t have to pay until I arrive. Then, I also had to look into travel insurance. I decided to go with the usual backpackers’ insurance, World Nomads. I went with the Standard Plan since I’m only travelling with a backpack and therefore the chance of me losing luggage/getting thousands of dollars worth of stuff stolen is pretty low. Plus hopefully emergency medical costs in Asia would be lower compared to other countries. I paid $395.01 CAD (or $425.04 AUD) for my 130-day trip (plus added 7 extra days when I arrive back in Australia until I get my Medicare re-sorted). Therefore, it comes to about $2.90 CAD (or $3.10 AUD) per day.
Packing
In terms of packing, I wasn’t sure whether I should go with the carry-on route or try to check in a bag. After doing a trip to Tasmania and a trip to Byron Bay/Brisbane in September, I realized that it would be a huge challenge to try to do a 4-month trip with only 7 kg. I decided that I’d probably have to check in a bag but upon looking at the prices and finding out that it would cost me 78 dollars EACH WAY for my flight from Melbourne to Bangkok alone, I knew I wasn’t going to pay over 300 dollars just to carry a heavier bag around. Therefore, the 7kg challenge was a challenge that I was going to have to accept. Since most bags weigh about 2-3kg on their own, my first step was to find the lightest bag that I could. After tons of research, I ordered a Cabin Zero bag from the UK, which cost me $110 AUD. This 44L bag is awesome because it only weighs 0.76kg, which leaves me a lot of weight to add. It has a ten year warranty, and it has a unique lost-and-found tag so I can trace my bag if it gets lost. It opens like a suitcase would, which makes finding items a lot easier.


I also decided to buy some packing cubes in order to keep my bag more organised. I had bought some cheap packing cubes for my Africa trip but the zippers already broke after opening them a few times, so this time I paid $20 for a 7-piece Waterproof set. Everything is the perfect size to fit in my backpack, and there's even some space leftover!


Travel Essentials
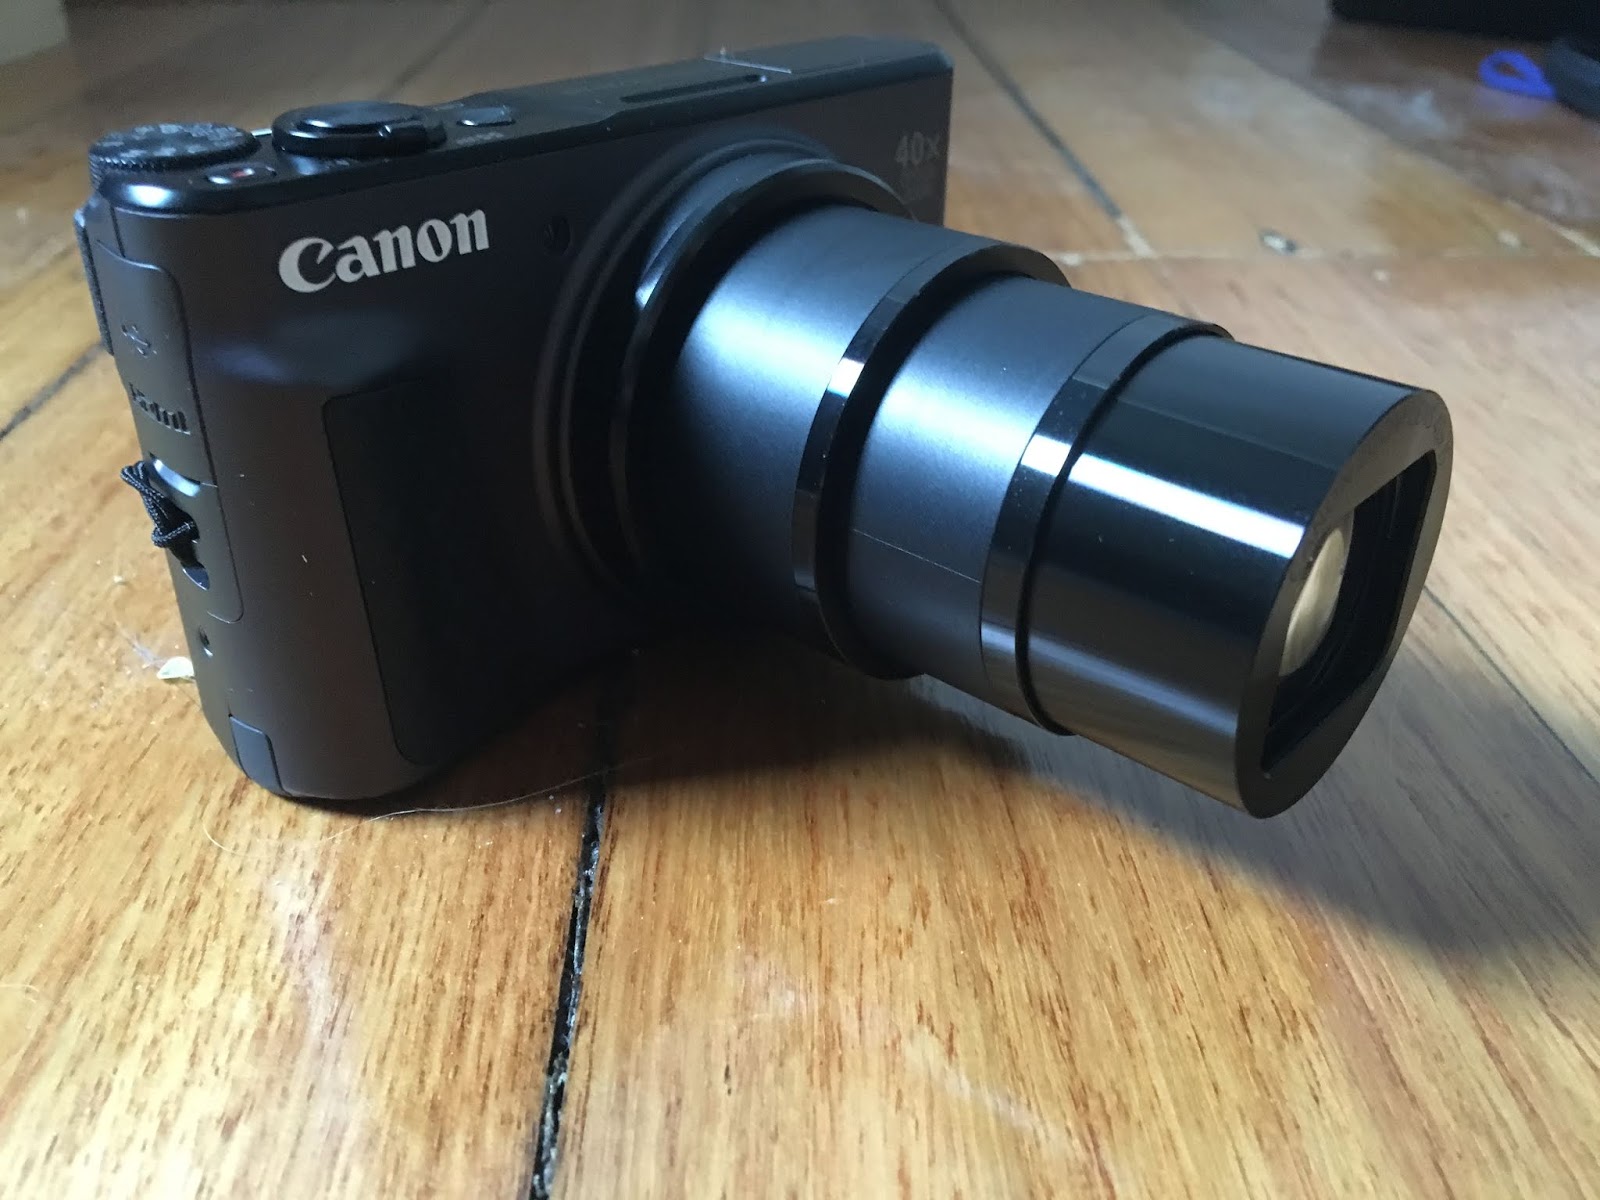
 |
| No zoom |
 |
| With zoom |

Another travel essential is a portable charging pod. I had already gotten my Poweradd Pilot X7 before, and I use it almost everyday when my phone is about to die when I'm coming home from work. It states that it can charge an iPhone 7 six times and with my iPhone 6s, I can definitely get at least ten charges out of it. Perfect when you don’t know the next time you’ll be around a power outlet!
And speaking of power outlets, it’s also important to have a good adapter. I got my universal adapter a couple of years ago when I was living in London and I take it on all of my trips (and now use it everyday for all of my Canadian items in Australia). While it’s a bit bulky, it has every outlet option to plug into, plus it has 2 USB ports and 1 plug-in, so I can charge three items at one time (whether it be my camera, phone, pedometer, selfie stick, charging pod, etc.) - so handy!
The last electronic device that’s not necessarily an essential, but is nice to have is my new Mi Band3, which is like a FitBit but a different brand. It has the time, the weather, counts my steps, tracks my light and deep sleep, and will update me of any messages I get on Facebook, WhatsApp, WeChat, etc (obviously only if I’m on data or Wifi).


Thank goodness it was just Black Friday because I was able to take advantage of travel deals last week! I was on the search for hiking shoes and a waterproof jacket, and stopped at the DFO (designer fashion outlet) to find the best deals. I made all of my purchases at Adventure Megastore, which is the only store (that I know of) in Australia that sells Columbia products. I found some waterproof hiking shoes, which out of all of the shoes I tried on at DFO, I liked the best because they were less bulky than all of the other waterproof shoes (as in they just felt like regular running shoes). I got the Columbia Peakfreak XCRSN II Xcel shoe for $149 (originally $250). I then found a waterproof Columbia Arcadia II rain jacket for $99 (originally $180).


The last essential item that I got is a type of travel belt, but it’s not your typical ugly travel belt that your mom makes you wear on your first flight to Europe. I love these ones because they are made for people who run (not me), so they can put in their phones, keys, etc. It’s a stretchy piece of fabric that goes around your entire body so you have to put it over your head or your legs in order to take it off - no one will be able to clip or cut it off. It fits tightly against your skin so if you’re wearing a shirt overtop, you can’t even tell that it’s there (and you usually forget that you have it on). I bought one from a company called Stashbandz for my Africa trip and loved it - I’d always put it on when we went through border control. I tried to get the same one for this trip but after having to wait over a month for it to come from the US (it still hasn’t arrived), I found a similar one from an Australia-based company called FlipBelt.

So now, I have less than 24 hours to make sure my bag is 7kg or smaller. Right now, I'm hovering around 7.3kg, but I'd like to stay on the safe side, especially because I'll be taking multiple flights and I'll probably accumulate some stuff on my trip. Wish me luck!
No comments:
Post a Comment